Steps for CPR: Complete 2026 July Guide to Adult, Child, and Infant Cardiopulmonary Resuscitation
Master the steps for CPR with our 2026 July guide covering adult, 📗 child, and infant CPR, AED use, ACLS algorithm basics, and recovery position techniques.
Learning the correct steps for CPR can transform an ordinary bystander into the most important person in the room during a cardiac arrest. Every year, more than 350,000 out-of-hospital cardiac arrests occur in the United States, and survival rates double or even triple when CPR is started immediately. Whether you are a parent, teacher, healthcare worker, or simply a concerned citizen, knowing exactly what to do in those first critical minutes is the difference between life and death. This guide walks through every action you need to take, from scene safety to handoff.
The fundamentals of CPR have been refined over decades of clinical research, but the core principles remain consistent across organizations like the American Heart Association, the Red Cross, and the national cpr foundation. The 2020 guidelines reaffirmed the chest-compression-first approach (C-A-B), and the 2025 update emphasized high-quality compressions, minimal interruptions, and early defibrillation. You do not need to be a clinician to perform effective CPR; you simply need to follow a clear sequence and act with confidence.
This article covers the full sequence for adults, children, and infants, including hands-only CPR, rescue breaths, AED use, and the recovery position. We will also touch on related topics like the acls algorithm for advanced providers, the difference between pals certification and BLS, and what to do when someone is breathing but unresponsive. Each section is built around what the evidence actually shows works, not outdated techniques you may have learned years ago.
Cardiac arrest is different from a heart attack. A heart attack is a plumbing problem (blocked artery), while cardiac arrest is an electrical problem that stops the heart from pumping. Without circulation, brain damage begins within 4 to 6 minutes. CPR keeps oxygenated blood flowing to the brain and vital organs until advanced care arrives. The faster and more correctly you act, the better the outcome — and the steps below will give you the muscle memory to act decisively.
We will also address common myths: that you can hurt someone by performing CPR incorrectly (you cannot make a dead person more dead), that you must give breaths to help (compression-only CPR works for sudden adult collapse), and that you need certification to legally help (Good Samaritan laws protect lay rescuers in all 50 states). Read on for the complete, evidence-based guide.
By the end of this article, you will know exactly how to assess a scene, call for help, deliver chest compressions at the right depth and rate, use an AED, and care for the patient until paramedics take over. Bookmark this page, share it with family, and consider hands-on practice through a certified course — because watching a video is no substitute for muscle memory. Lives depend on what you do in the first 90 seconds.
Let's start with the foundational checklist that guides every rescuer, regardless of age group or setting.
CPR by the Numbers in 2026

The Universal CPR Action Sequence
Check the Scene
Check Responsiveness
Call 911 and Get an AED
Start Chest Compressions
Open Airway & Give Breaths
Attach AED and Continue
Adult CPR begins with the recognition of sudden collapse and unresponsive, abnormal breathing. Gasping (agonal respirations) is NOT normal breathing — it is a sign the brain is starving for oxygen and CPR must begin immediately. Many bystanders mistake these gasps for life and delay compressions, which is one of the most common reasons people die from witnessed cardiac arrest. If you see anyone gasping or making strange snoring sounds after collapse, treat it as cardiac arrest and start compressions without hesitation.
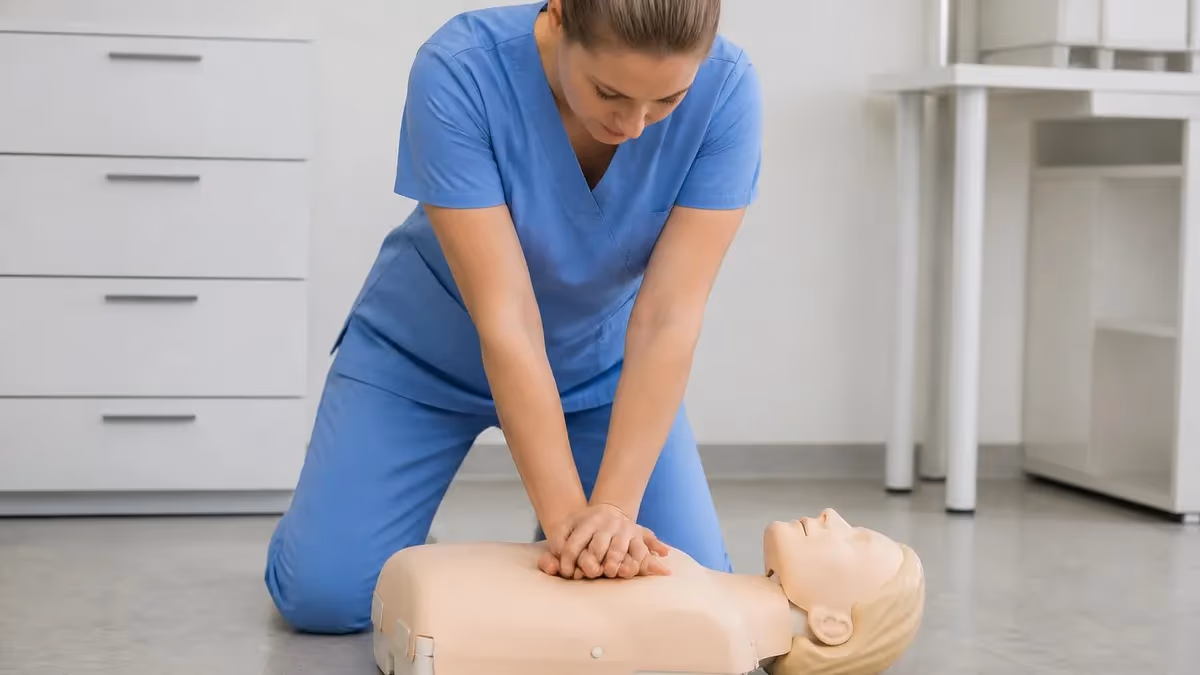
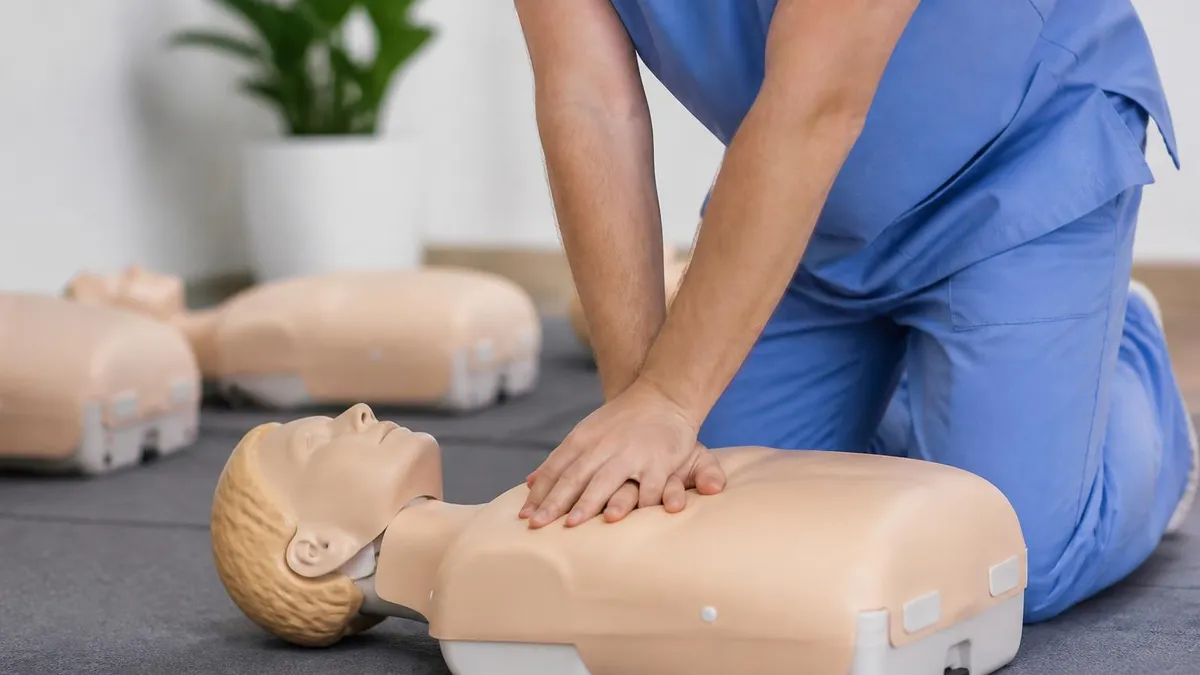
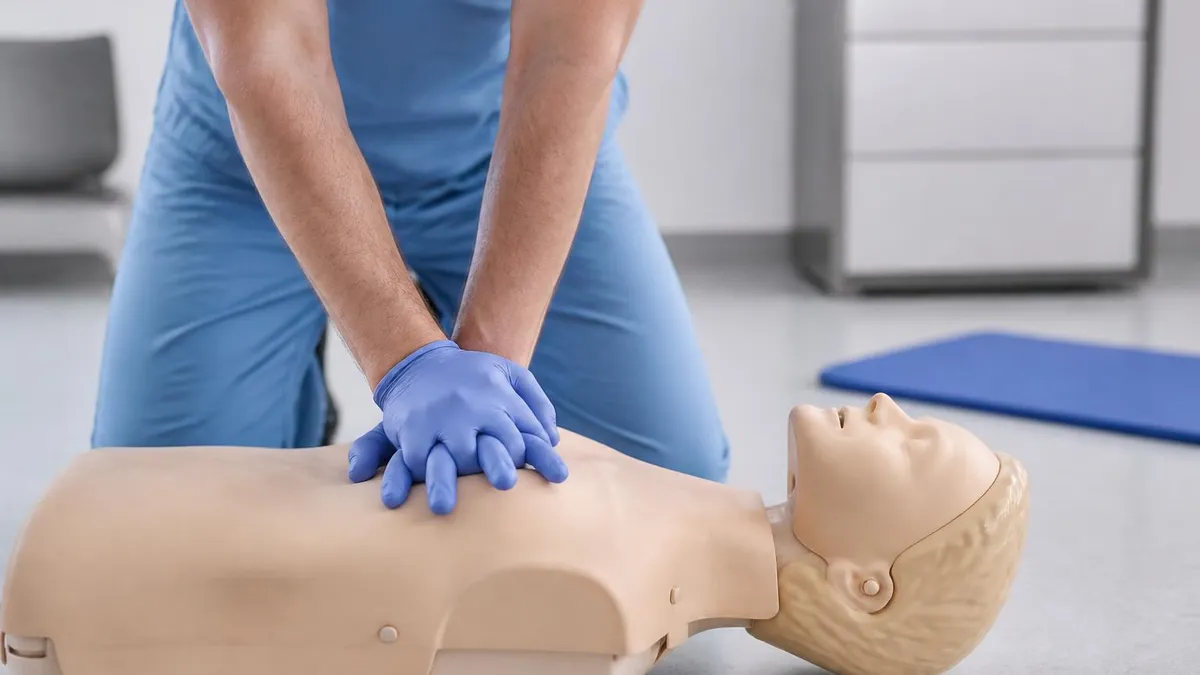
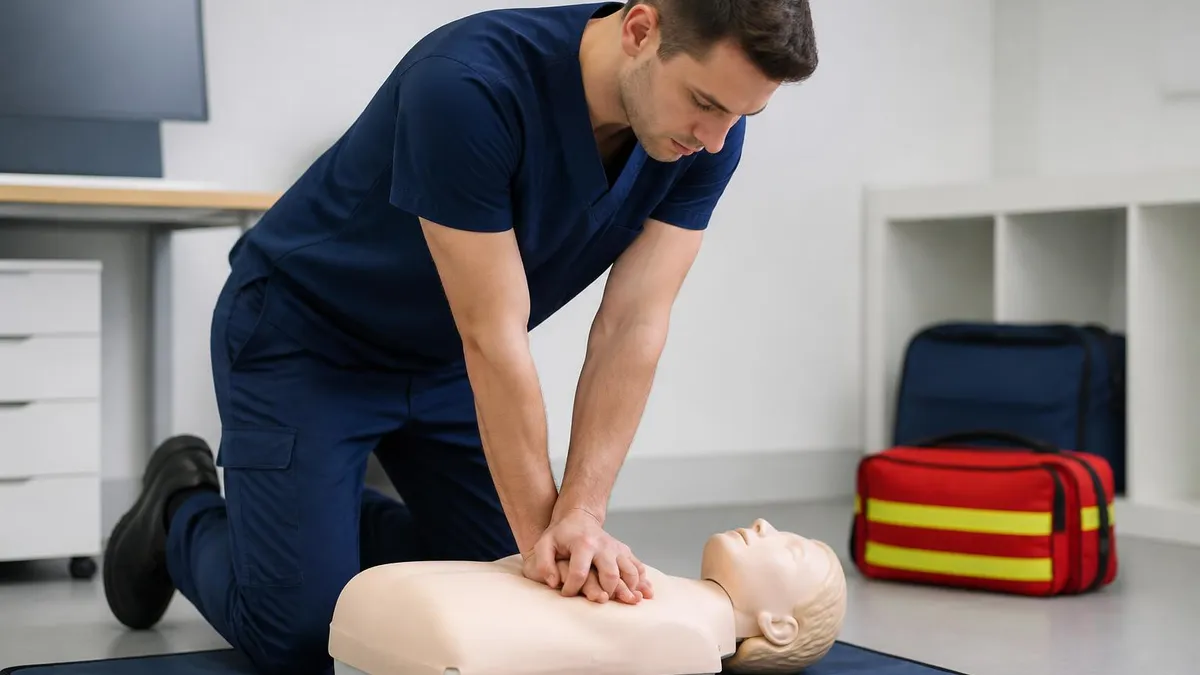
Hand placement matters enormously. Place the heel of your dominant hand on the lower half of the sternum, directly between the nipples. Stack your other hand on top, interlock your fingers, and lift them slightly off the chest so all pressure goes through the heel. Keep your elbows locked straight, shoulders directly over your hands, and use your body weight — not just arm strength — to drive each compression. This biomechanics-based approach prevents fatigue and produces deeper, more consistent compressions.
The correct compression rate is 100 to 120 per minute, which matches the beat of songs like 'Stayin' Alive' by the Bee Gees or 'Crazy in Love' by Beyoncé. Depth is just as important: at least 2 inches but no more than 2.4 inches in an average adult chest. Allow full chest recoil between compressions — leaning on the chest prevents the heart from refilling with blood and dramatically reduces effectiveness. Counting out loud helps you and any helpers stay synchronized.
If you are trained and willing, deliver two rescue breaths after every 30 compressions. Open the airway with a head-tilt, chin-lift maneuver, pinch the nose closed, make a complete seal over the mouth, and blow steadily for one second — just enough to see the chest rise. Avoid over-ventilating; forcing too much air can push it into the stomach, causing vomiting and aspiration. If you are untrained or uncomfortable with mouth-to-mouth, compression-only CPR is officially endorsed for adult bystander rescue.
Switch rescuers every two minutes if possible. Compression quality drops measurably after 90 seconds of continuous effort, even in fit individuals, and rescuer fatigue is the leading cause of inadequate depth. Plan the swap during the brief pause for rhythm analysis when an AED is attached, so compressions are interrupted for less than 10 seconds. A well-coordinated team can sustain high-quality CPR for the 8 to 12 minutes it typically takes EMS to arrive.
Do not stop compressions unless one of four things happens: the patient starts moving or breathing normally, EMS takes over, an AED instructs you to clear for analysis or shock, or you are physically unable to continue. Even between AED shocks, resume compressions immediately — every second of paused circulation reduces the chance of return of spontaneous circulation. Survival outcomes correlate directly with the percentage of time compressions are being delivered, called the chest compression fraction.
For a deeper walkthrough of standard versus hands-only adult technique, our complete adult CPR guide breaks down each step with diagrams and timing cues you can practice at home.

CPR Practice Test Questions
Prepare for the CPR Cardiopulmonary Resuscitation Practice exam with our free practice test modules. Each quiz covers key topics to help you pass on your first try.
CPR Basic CPR
CPR Exam Questions covering Basic CPR. Master CPR Test concepts for certification prep.
CPR and First Aid
Free CPR Practice Test featuring and First Aid. Improve your CPR Exam score with mock test prep.
CPR (Cardiopulmonary Resuscitation) Adult ...
CPR Mock Exam on (Cardiopulmonary Resuscitation) Adult CPR and AED Usage. CPR Study Guide questions to pass on your first try.
CPR (Cardiopulmonary Resuscitation) Airway...
CPR Test Prep for (Cardiopulmonary Resuscitation) Airway Obstruction and Choking. Practice CPR Quiz questions and boost your score.
CPR (Cardiopulmonary Resuscitation) Cardio...
CPR Questions and Answers on (Cardiopulmonary Resuscitation) Cardiopulmonary Emergency Recognition. Free CPR practice for exam readiness.
CPR (Cardiopulmonary Resuscitation) Child ...
CPR Mock Test covering (Cardiopulmonary Resuscitation) Child and Infant CPR. Online CPR Test practice with instant feedback.
CPR (Cardiopulmonary Resuscitation) High-P...
Free CPR Quiz on (Cardiopulmonary Resuscitation) High-Performance Team Dynamics. CPR Exam prep questions with detailed explanations.
CPR (Cardiopulmonary Resuscitation) Legal ...
CPR Practice Questions for (Cardiopulmonary Resuscitation) Legal and Ethical Considerations. Build confidence for your CPR certification exam.
CPR for Specific Populations
CPR Test Online for for Specific Populations. Free practice with instant results and feedback.
CPR Airway & Breathing Management
CPR Exam Questions covering Airway & Breathing Management. Master CPR Test concepts for certification prep.
CPR Assessment & Recognition of Cardiac Ar...
Free CPR Practice Test featuring Assessment & Recognition of Cardiac Arrest. Improve your CPR Exam score with mock test prep.
CPR Chest Compressions & Defibrillation
CPR Mock Exam on Chest Compressions & Defibrillation. CPR Study Guide questions to pass on your first try.
CPR Post-Resuscitation Care & Recovery
CPR Test Prep for Post-Resuscitation Care & Recovery. Practice CPR Quiz questions and boost your score.
Infant CPR, Child CPR, and Pediatric Differences
Infant cpr uses two fingers placed just below the nipple line on the breastbone, compressing about 1.5 inches or one-third the depth of the chest. The compression-to-ventilation ratio is 30:2 for a single rescuer and 15:2 for two healthcare rescuers. Maintain a rate of 100 to 120 per minute, matching adult cadence, but with much gentler force tailored to the infant's smaller chest cavity and more fragile rib structure.
Rescue breaths for infants require covering both the mouth and nose with your mouth and delivering small, gentle puffs — just enough to see the chest rise. Over-inflating an infant's lungs can cause barotrauma. Most pediatric arrests are respiratory in origin, not cardiac, so prompt rescue breathing is critical. Untrained bystanders should still attempt compressions even if breaths feel intimidating; doing something is always better than doing nothing.
Hands-Only CPR vs Standard CPR with Breaths
- +Easier for untrained bystanders to remember and execute under stress
- +No mouth-to-mouth contact reduces hesitation and disease concerns
- +Continuous compressions maintain higher coronary perfusion pressure
- +Recommended by AHA for adult witnessed sudden collapse
- +Studies show equivalent survival rates for adult cardiac arrest
- +Eliminates dangerous interruptions for ineffective breaths
- +Faster to teach in dispatcher-assisted telephone CPR scenarios
- −Not appropriate for drowning, drug overdose, or pediatric arrest
- −Less effective in prolonged arrests beyond 10 minutes
- −Does not address respiratory-cause arrests in children and infants
- −Misses opportunity to restore oxygenation in hypoxic patients
- −Healthcare providers expected to perform full 30:2 technique
- −May not meet workplace certification requirements alone

AED Use Checklist — What Does AED Stand For and How to Use One
- ✓Turn the AED on immediately — it will speak step-by-step voice prompts
- ✓Expose the chest fully and wipe it dry if wet or sweaty
- ✓Remove medication patches, jewelry, and underwire bras from pad placement areas
- ✓Apply one pad to the upper right chest below the collarbone
- ✓Apply the second pad to the lower left side, below the armpit
- ✓Plug the connector into the AED if not pre-connected
- ✓Ensure no one is touching the patient during rhythm analysis
- ✓Clear the patient verbally before delivering a shock — shout 'Clear!'
- ✓Resume compressions immediately after the shock with no delay
- ✓Continue 2-minute CPR cycles until EMS arrives or patient revives
What Does AED Stand For? Automated External Defibrillator
An AED is an Automated External Defibrillator — a portable device that analyzes heart rhythm and delivers an electric shock to restore a normal heartbeat if needed. AEDs are designed for untrained users; the device will not shock unless a shockable rhythm is detected. Every minute defibrillation is delayed reduces survival by 7 to 10 percent, so finding and using an AED quickly is the single most powerful intervention available to a bystander.
Once a patient regains a pulse and starts breathing on their own, your job is not over. The post-resuscitation period is critical because rearrest is common in the first hour after return of spontaneous circulation. If the patient is unresponsive but breathing normally and you do not suspect spinal injury, place them in the recovery position to keep the airway clear and prevent aspiration of vomit. This position recovery technique has been a staple of first aid for decades and remains a core competency in every certification course.
To place an adult in the recovery position, kneel beside them and straighten their legs. Place the arm nearest you at a right angle to their body, palm facing up. Bring the far arm across their chest and place the back of their hand against their cheek nearest you. Bend the far knee, then roll them toward you onto their side. Tilt the head back slightly to keep the airway open and adjust the upper hand under the cheek to maintain the position.
Monitor respiratory rate and overall condition continuously. A normal adult respiratory rate is 12 to 20 breaths per minute; anything below 10 or above 24 is concerning and warrants reassessment. Watch for changes in skin color, level of consciousness, and pulse. If breathing stops or becomes agonal again, roll the patient onto their back and resume CPR immediately. Do not assume the crisis is over until paramedics have taken over and the patient is stable.
If you suspect any spinal injury — from a fall, car crash, diving accident, or assault — do not move the patient unless absolutely necessary. Instead, use a jaw-thrust maneuver to open the airway without tilting the neck, and maintain manual cervical stabilization until EMS arrives with proper immobilization equipment. The recovery position should only be used when spinal injury is clearly not a factor and the patient is in a position where vomit or fluids could obstruct breathing.
Document everything you can for the paramedics: time of collapse, time CPR started, number of shocks delivered by the AED, any medications the patient takes, and any witnessed details about what happened before the arrest. This information shapes the treatment EMS provides in the field and the hospital provides on arrival. Even a rough estimate beats no information at all, and your account often becomes part of the official medical record.
Expect to feel shaken afterward. Performing CPR is physically exhausting and emotionally intense, even when the outcome is good. Many rescuers experience symptoms of acute stress in the days that follow, including intrusive memories, sleep disturbance, and second-guessing. This is normal. Reach out to your local EMS agency, employee assistance program, or a mental health professional if symptoms persist beyond a week or two. Helping someone in their worst moment leaves a mark, and processing it is part of taking care of yourself.
Many communities now offer post-arrest survivor reunions and rescuer debriefings — these can be powerful for closure and continued learning.
One of the most common bystander mistakes is stopping CPR too early because the patient looks 'gone' or unresponsive. CPR is meant to be done on unresponsive patients — continuing through that appearance is the entire point. Only stop when EMS takes over, the patient shows clear signs of life (movement, normal breathing, or speaking), an AED instructs you to pause, or you are physically unable to continue.
Formal CPR training transforms reading about life support into the confidence to actually perform it under pressure. Hands-on practice on manikins develops the muscle memory and physical stamina that articles and videos simply cannot teach. Most major employers — schools, gyms, daycares, healthcare facilities, and increasingly office workplaces — now require some level of CPR certification, and many states mandate it for high school graduation. Even if it is not required, taking a course is one of the highest-leverage investments of four hours you can make.
The most common entry-level course is the American Heart Association Heartsaver CPR/AED, which covers adult, child, and infant CPR plus AED use and basic choking response. It costs $50 to $100 and certifies you for two years. Healthcare providers typically take Basic Life Support (BLS) instead, which is more rigorous and uses bag-mask ventilation and two-rescuer techniques. The Red Cross offers equivalent courses, and the bls cpr course guide on our site compares formats side by side to help you pick the right one.
Advanced providers — paramedics, ICU nurses, ER physicians — go on to Advanced Cardiovascular Life Support (ACLS) and Pediatric Advanced Life Support (PALS). The acls algorithm covers cardiac arrest, bradycardia, tachycardia, and post-arrest care using medications, advanced airways, and rhythm interpretation. PALS does the same for pediatric patients. These certifications take 12 to 16 hours and require a current BLS card as a prerequisite. They are not for lay rescuers but are essential for hospital staff who respond to codes.
Online-only certification has exploded in popularity, but quality varies wildly. Reputable providers blend e-learning with an in-person skills check on a manikin, which most employers and licensing boards require. Be wary of fully online 'certifications' that issue cards without any hands-on assessment — they are often not accepted by hospitals, daycares, or state agencies. Always verify your provider's accreditation through the American Heart Association, American Red Cross, or American Safety and Health Institute before paying.
Renewal is required every two years for most certifications, though the actual skill decay starts within 6 to 12 months. Many experts now recommend brief refresher practice every 3 to 6 months — even just 5 minutes on a feedback manikin can keep your technique sharp. Some employers provide quarterly drills using high-fidelity training systems that score depth, rate, and recoil in real time. These short, frequent sessions outperform once-every-two-years marathon classes in retention studies.
If you cannot take a formal class right now, dispatcher-assisted CPR is the backup plan. Modern 911 systems train operators to coach untrained callers through compressions over the phone in real time. Studies show telephone-guided CPR doubles bystander participation and improves survival meaningfully. Save your local emergency number, keep your phone charged, and trust that even an untrained rescuer following dispatcher instructions is dramatically better than no rescuer at all.
For a refresher on verifying or replacing your card, see our cpr card lookup tutorial, which walks through every major issuer's system.
Beyond the formal steps, several practical tips dramatically improve the odds of a positive outcome and help you stay calm under pressure. First, practice your scene size-up in non-emergencies — when you walk into restaurants, gyms, or airports, scan for AED locations. Knowing where the nearest device is before you need it can shave precious minutes off response time. Many smartphones now show nearby public AEDs through apps like PulsePoint, which is worth installing if you live in a participating area.
Second, use a metronome app or a mental song to maintain compression rate. Aim for 100 to 120 per minute — the tempo of 'Stayin' Alive,' 'Another One Bites the Dust,' or 'Walk the Line.' If you cannot remember a song, count out loud: 'one and two and three and four' at a brisk pace. Counting also helps any helpers stay synchronized and provides a verbal cue to switch rescuers every two minutes without breaking rhythm.
Third, do not be afraid of breaking ribs. Cracking ribs during CPR is common — it happens in roughly 30 percent of cases — and is far preferable to under-compressing and letting the patient die. Bones heal; brains starved of oxygen do not. Push hard, push fast, and push at full depth even if you feel a pop. Real rescuers in real arrests consistently report this is the hardest psychological barrier to push through, and the data on outcomes is unambiguous.
Fourth, never confuse cpr cell phone repair or cpr phone repair stores with the medical procedure. CPR Cell Phone Repair is a national retail chain — completely unrelated to cardiopulmonary resuscitation — but their name often crowds search results for actual CPR information. When you are looking for guidance, training, or certification, look for medical organizations like the AHA, Red Cross, or accredited national cpr foundation programs, not retail repair shops.
Fifth, debrief after any real-world event. Talk through what went well and what could have gone better with anyone else involved. Even short, structured debriefs improve future performance and reduce psychological aftermath. If you are part of a workplace response team, schedule formal debriefs after every code or simulated drill. Continuous improvement is how good rescuers become great ones and how teams build the cohesion that saves more lives.
Finally, advocate for CPR education and AED placement in your community. Push your local schools, employers, and public venues to install AEDs and train staff. Communities with high bystander CPR rates and dense AED coverage routinely report survival rates 2 to 3 times higher than communities without. Your voice as a trained advocate carries weight — and the next life saved by an AED in your gym, school, or office could be someone you love.
The steps for CPR are simple to learn but powerful to deploy. Read this guide, take a class, practice often, and be ready. Someone is depending on you.
CPR Questions and Answers

CPR Card Lookup: How to Verify, Replace, and Access Your CPR Certification in 2026
AHA CPR: What It Is, Which Course You Need, and How to Get Certified
BLS CPR Course: Complete Guide to Basic Life Support Certification in 2026
Adult CPR: Complete Step-by-Step Guide to Hands-Only and Standard CPR in 2026

CPR - Cardiopulmonary Resuscitation: Complete Study Guide 2026
About the Author
Registered Nurse & Healthcare Educator
Johns Hopkins University School of NursingDr. Sarah Mitchell is a board-certified registered nurse with over 15 years of clinical and academic experience. She completed her PhD in Nursing Science at Johns Hopkins University and has taught NCLEX preparation and clinical skills courses for nursing students across the United States. Her research focuses on evidence-based exam preparation strategies for healthcare certification candidates.
Join the Discussion
Connect with other students preparing for this exam. Share tips, ask questions, and get advice from people who have been there.
View discussion (5 replies)